


Key Takeaways
- Stock wound care basics, personal protective equipment, and a CPR barrier, then layer in bleeding control gear such as a quality tourniquet and hemostatic gauze.
- Add tools made for the road, including trauma shears, a flashlight or headlamp, an emergency blanket, and clear instructions.
- Choose medications carefully and rotate often, since heat and cold in cars can degrade products faster than at home.
- Organize supplies in a durable, secured case; inspect quarterly, replace expired items, and tailor contents to your passengers and risks.
- Use recognized standards like ANSI/ISEA Z308.1 for guidance, and consider training such as CPR and Stop the Bleed to use your kit confidently.
Core First Aid Essentials for Every Vehicle
Start with foundational items that cover the most common injuries you might see on the road. Prioritize personal protective equipment, basic wound care, and simple tools to handle cuts, scrapes, and minor burns. These are the backbone of a reliable car first aid kit and form the base layer you will build on for more serious emergencies.
Personal protection and wound care
- Nitrile gloves, at least 4 to 6 pairs, to protect both rescuer and patient.
- Antiseptic wipes or povidone iodine swabs for cleaning intact skin around wounds.
- Adhesive bandages in assorted sizes for small cuts and blisters.
- Sterile gauze pads (4x4 and 2x2) and roller gauze for dressing and wrapping wounds.
- Medical tape, cloth or hypoallergenic, for secure dressing placement.
- Triangular bandage for slings, pressure bandages, and improvised stabilization.
- Instant cold packs for sprains and swelling.
- Burn gel or a hydrogel burn dressing for minor thermal burns from engines or hot surfaces.
- Saline or eyewash ampoules for gentle irrigation of minor debris in eyes or wounds.
- CPR barrier, such as a face shield or mask with one way valve, to protect during rescue breaths.
Choose nitrile over latex when possible. Latex allergies are common and may not be known in advance, especially when assisting strangers at a roadside scene.
Why these items matter
Roadside injuries often involve dirt, glass, or sharp edges, so cleaning and covering wounds quickly reduces contamination and bleeding. Gloves keep your hands safe, while gauze, tape, and a triangular bandage help you stabilize and protect until professional care arrives. A CPR barrier gives you confidence to start care for a sudden cardiac arrest while protecting you from fluids. These low weight, high value basics fit easily in any vehicle and are frequently the first supplies you will reach for.
Tools That Make Treatment Easier on the Road
In a vehicle environment, tools that cut cleanly, illuminate your workspace, and organize information can make the difference between chaos and calm. Focus on items that work under stress, with gloved hands, and in low light. The right tools also help you avoid further injury from broken glass, seat belts, or twisted fabric.
Road ready tools to include
- Trauma shears to cut clothing, seat belts, or bandages without damaging the skin.
- Tweezers for small debris and splinter removal.
- Elastic wrap bandage for compression and support of sprains.
- Compact SAM style splint to immobilize suspected fractures or sprains.
- Irrigation syringe to flush wounds with controlled pressure.
- Flashlight or headlamp with spare batteries for night scenes or dark interiors.
- Emergency blanket to prevent hypothermia and for patient privacy.
- Thermal gloves or a small pair of work gloves to handle hot surfaces or debris.
- Permanent marker, pen, and waterproof notepad to record times, medications taken, or tourniquet application time.
- Small waste bags or biohazard bags for used gauze and gloves.
- Instruction card or first aid quick guide for reference under stress.
Secure your kit so it cannot become a projectile. In sudden stops or collisions, loose gear can cause injury. Use hook and loop straps, cargo nets, or under seat mounts to keep the kit in place.
Placement tips for quick access
Store your kit in a crush resistant case behind a seat, under a seat, or in a side trunk compartment. Keep it visible and reachable without unpacking your entire trunk, particularly if you drive a hatchback or SUV with cargo stacked. Consider a two part system: a small pouch with gloves, gauze, and a tourniquet in the cabin, and a larger kit in the trunk for extended care. Label the case clearly so passengers can find it fast if you are the injured person.
Medications and Condition Specific Add ons
Medications can add relief and stability during long waits for help, but vehicles present storage challenges. Choose a small, targeted set, store them in their original packaging, and rotate them frequently. Always consider passenger sensitivities and consult a clinician before adding prescription items.
Smart medication choices for the road
- Analgesics: acetaminophen or ibuprofen for pain and fever, with dosing noted.
- Aspirin (81 mg chewable) for adults with suspected heart attack, if not allergic and if advised by a clinician or 911 dispatcher.
- Antihistamine, such as diphenhydramine, for allergic reactions or hives.
- Antacid tablets and anti diarrheal medication for gastrointestinal distress.
- Hydrocortisone cream for minor itching and rashes.
- Oral rehydration salts to mix with clean water during heat stress or dehydration.
- Glucose gel or tablets for known diabetics with low blood sugar.
- Epinephrine auto injector for individuals with prescribed treatment of severe allergic reactions.
- Naloxone nasal spray where permitted, carried according to local laws and training.
High heat and freezing temperatures can degrade medications and adhesives. Many manufacturers and the FDA advise avoiding storage in vehicles for extended periods, or rotating contents often to mitigate temperature extremes.
Storage and documentation
Keep medications in a small, insulated pouch within the kit and, when practical, bring them inside during extreme temperatures. Write purchase and expiration dates directly on boxes or blister packs with a permanent marker. Carry a concise medical information card listing allergies, current medications, and conditions for each frequent passenger. For children, include caregiver contact information and consent to treat documentation when appropriate. Avoid decanting pills into unlabeled containers; original packaging preserves dosing information, lot numbers, and expiration dates, which are important during an emergency.
Bleeding Control for High impact Roadside Injuries
Crashes and roadside work can lead to severe bleeding, which is immediately life threatening. Building a dedicated bleeding control capability into your kit empowers you to act fast while EMS is on the way. At minimum, include a true, windlass tourniquet and pressure dressings; consider hemostatic gauze for more demanding situations.
Critical bleeding control components
- Tourniquet that is proven and widely taught, such as a windlass style device designed for limbs. Avoid improvised or novelty devices.
- Hemostatic gauze with a clotting agent to pack deep wounds where direct pressure is not enough.
- Pressure dressing or emergency trauma dressing to maintain firm, consistent pressure over a bleeding site.
- Large trauma pads or abdominal pads to cover and absorb heavy bleeding.
- Extra nitrile gloves and a permanent marker to note tourniquet time.
Stop the Bleed training emphasizes that severe hemorrhage can be fatal within minutes. Immediate action with direct pressure, wound packing, and a proper tourniquet saves lives.
Simple steps that save lives
- Call 911 and ensure the scene is safe. Put on gloves.
- Apply firm direct pressure with a dressing. If bleeding soaks through, add more layers and keep pressing.
- For deep wounds that keep bleeding, pack the wound tightly with hemostatic gauze, then hold pressure for several minutes.
- For life threatening limb bleeding that will not stop, place a tourniquet 2 to 3 inches above the wound, not over a joint. Tighten until bleeding stops. Record the time of application.
If you have additional training, consider chest seals for penetrating chest injuries. While this level of kit is beyond a basic car kit, it is appropriate for rural responders, outdoor professionals, or workplace fleets exposed to higher risk. Whatever you choose, practice with trainer devices so you can deploy gear quickly and correctly under stress.
Smart Organization, Storage, and Maintenance in Vehicles
A car is a harsh environment for medical supplies. Heat, cold, vibration, and dust can shorten the life of adhesives, batteries, and medications. A well organized, protected kit that you maintain on a schedule is more valuable than an overstuffed bag that fails when you need it.
Choose the right case and layout
- Use a hard sided or reinforced soft case with compartments or color coded pouches.
- Seal small items in zip bags to protect from moisture and dust.
- Label sections clearly: PPE, Wound Care, Bleeding Control, Medications, Tools.
- Include a contents checklist with quantities and expiration dates.
Parked vehicles can heat rapidly. In warm weather, interior temperatures can exceed 130 degrees Fahrenheit within minutes. Plan rotation and storage with this reality in mind.
Maintenance routine that works
- Inspect quarterly, and before long road trips. Replace expired or damaged items.
- Test flashlights and replace batteries on a schedule. Consider lithium primary batteries for better heat tolerance.
- Rotate medications seasonally if your vehicle sees extreme temperatures.
- Restock items you used immediately, even if only a few bandages.
- Practice locating key items with your eyes closed; muscle memory matters in the dark.
Secure the kit with straps or brackets so it stays put in hard braking. For trucks and SUVs, behind seat storage or cargo area tie downs work well. For sedans, consider trunk side wells or under seat kits. If you travel with pets, add a spare leash, a soft muzzle, and pet safe wound care items, and confirm dosing of any medications with your veterinarian. Finally, brief frequent passengers on where the kit is and how to retrieve it if you are unable to move.
Standards, Regulations, and Building the Right Kit for You
There is no single federal list for every personal vehicle in the United States, but there are respected frameworks that help you choose contents wisely. For work vehicles, your safety program or insurer may specify a standard to follow, and some jurisdictions outside the United States require specific contents.
Standards to guide your build
- ANSI/ISEA Z308.1 Class A and Class B workplace first aid kit standards outline a strong baseline of components. Class B includes more robust trauma supplies, which many fleets adopt.
- DIN 13164 is a European standard that specifies car first aid kit contents for many EU countries. If you travel abroad, confirm local requirements.
- For U.S. commercial motor vehicles, emergency equipment like triangles and fire extinguishers are specified, while first aid kit contents are typically guided by company policy or industry best practice.
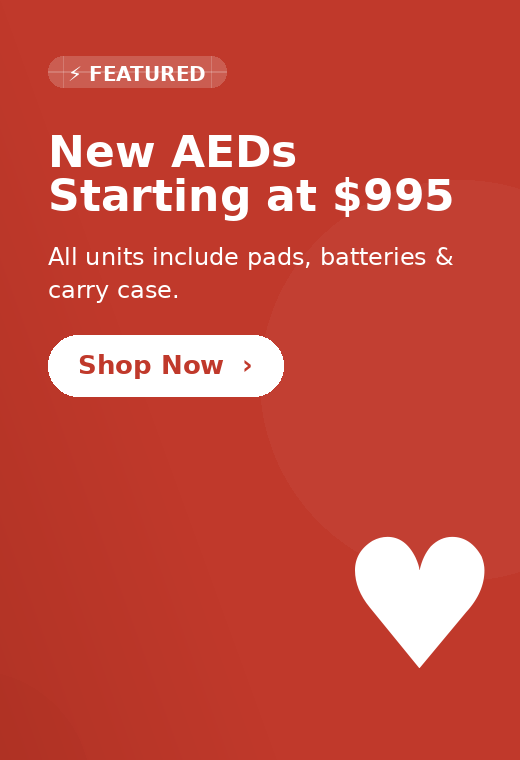
Bystander CPR can double or triple the chance of survival for out of hospital cardiac arrest. Consider adding an automated external defibrillator to fleet vehicles and getting CPR certified.
Tailoring by use case
- Family vehicles: emphasize child sized bandages, fever reducers with dosing charts, and extra wipes.
- Outdoor and adventure: add blister care, tick removal tools, elastic wraps, and a more comprehensive splint.
- Urban rideshare or delivery: prioritize bleeding control, gloves, and a compact kit in the cabin for quick access.
- Work fleets: align with ANSI Class B, add eye wash bottles where chemicals are present, and incorporate supervisor checklists.
Training completes the picture. A brief first aid and cardiopulmonary resuscitation course builds confidence to use your gear. Stop the Bleed classes teach direct pressure, wound packing, and use of a tourniquet. Document your training and refresh every two years to keep skills current. If you manage a fleet, include kit checks and training in your safety meetings and telematics dashboards. For many organizations, adding an automated external defibrillator to vehicles with multiple passengers or long routes is a high impact upgrade that integrates smoothly with first aid kits and bleeding control packs.
Final Thoughts
Your vehicle first aid kit should reflect how and where you drive, the number of passengers you carry, and the risks you face. Start with essentials, add bleeding control, then tailor tools and medications to your needs. Store it securely, maintain it on a schedule, and pair it with practical training for the best results.
Ready to build or upgrade your kit? Explore curated vehicle first aid kits, bleeding control packs, AEDs, and refill supplies at MyAED. Our team can help you select the right components for your family car, work truck, or fleet, and keep everything compliant, organized, and ready to use.


